September 6, 2022 . 13 MIN READ
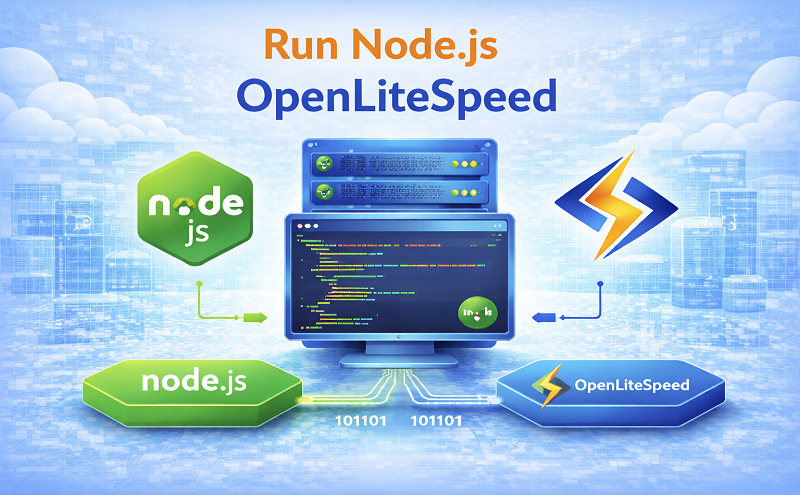
The OpenLiteSpeed Node.js One-Click app automatically installs performance web server OpenLiteSpeed, and Node.js. This image tends to be more than 4 times faster than Node.js with Nginx! OpenLiteSpeed features easy setup for SSL and RewriteRules. OLS is flexible and also supports Python and Ruby apps, as well as CMSs like WordPress.
Use the “OpenLiteSpeed Node.js 1-Click app” to create a Droplet with any plan you want. Click here to create an account and get a $100 Digital Ocean credit.
Use the “OpenLiteSpeed Node.js app” to create a server with any plan you want. Click here to create an account and get a $100 Vultr credit.
Use the “Deploy OpenLiteSpeed Node.js” to create a server with any plan you want. Click here to create an account
Use the “Deploy OpenLiteSpeed Node.js” to create a server with any plan you want. Click here to create an account
Use the “OpenLiteSpeed Node.js” from Marketplace to create an ECS instance with any plan you want.
From a terminal on your local computer, connect to the server as root, like so:
ssh root@use_your_server_ip
Be sure to substitute the server’s public IP address for use_your_server_ip. You can also use Cloud Console if the platform is supported.
An interactive script that runs will prompt you for your domain or subdomain:
Please input a valid domain:
Please verify it is correct. [y/N]
Enter your root domain only. The system will automatically add the www subdomain as well.
Note
You can press CTRL+C and continue to SSH, but the prompt will open again the next time you log in. It will continue to do so until you finish the whole setup.
If your domain is already pointed to this server, you will have the option of automatically applying Let’s Encrypt SSL. Enter y and your email address to complete the process:
Do you wish to issue a Let's encrypt certificate for this domain? [y/N]
Please enter your E-mail:
Please verify it is correct: [y/N]
Once finished, you should see Certificate has been successfully installed...
You can force HTTPS rules to be applied:
Do you wish to force HTTPS rewrite rule for this domain? [y/N]
Complete the process by pressing Y:
Do you wish to update the system which include the web server? [Y/n]
You should not be prompted to initiate this setup again.
Visit the default script by entering http://Server_IP on your browser and you should see Hello World from OpenLiteSpeed Node.js.
Start editing the Node.js file here
vim /usr/local/lsws/Example/html/node/app.js
Update system software.
sudo apt-get update && sudo apt-get upgrade -y
Your system is installed and ready to use!
The OpenLiteSpeed Node.js 1-Click Droplet installs several packages and performs other actions on your system.
| Component | Version |
|---|---|
| Linux | Ubuntu 22.04 |
| OpenLiteSpeed | Latest from LiteSpeedtech Repo |
| Node.js | Latest from APT |
| NPM | Latest from APT |
| Certbot | Latest from Certbot’s PPA |
Use the following command to test from a 4-CPU plan server(ab) to a 4-CPU plan server(DOMAIN)
ab -n 100000 -k -H "Accept-Encoding: gzip,deflate" -c 100 http://DOMAIN/
Requests per Second (The larger the number, the better)
| Nginx+PM2 | Openlitespeed |
|---|---|
| 2600 | 12000 |
Get the WebAdmin admin password:
cat .litespeed_password
Visit https://use_your_droplet_ip:7080 to access WebAdmin in a browser.
By default, WebAdmin uses port 7080. To allow access to 7080 from your IP(e.g. 1.2.3.4):
ufw allow from 1.2.3.4 to any port 7080
You can also allow all IPs access to port 7080:
ufw allow 7080
We suggest turning this port off once you’ve finished setup:
ufw delete allow 7080
Setting up an SSL certificate enables HTTPS on the web server, which secures the traffic between the server and the clients connecting to it. Certbot is a free and automated way to set up SSL certificates on a server.
To use Certbot, you’ll need a registered domain name and DNS records:
example.com) to the server’s IP addresswww (e.g., www.example.com) to the server’s IP address.Navigate to OpenLiteSpeed WebAdmin Console > Listeners, and add Your Domain to HTTP/HTTPS.
Once the DNS records are set up, you can generate the SSL certificate. Be sure to substitute the correct domain name in the following command:
certbot certonly --webroot -w /var/www/html/ -d example.com -d www.example.com
If certificate verification is a success, you should find your certificate files stored in /etc/letsencrypt/
Navigate to OpenLiteSpeed WebAdmin Console > Listeners > SSL, and edit the following three items:
/etc/letsencrypt/live/example.com/privkey.pem/etc/letsencrypt/live/example.com/fullchain.pemYesSave and perform a Graceful Restart.
Now your server should support TLS1.1, TLS 1.2, and TLS 1.3.
HTTPS traffic on port 443 is already allowed through the firewall. After you set up HTTPS, you can optionally rewrite all HTTP traffic to HTTPS.
Add the following rules to OpenLiteSpeed WebAdmin Console > Virtual Hosts > Rewrite > Rewrite Rules
RewriteCond %{SERVER_PORT} 80
RewriteRule ^(.*)$ https://example.com/$1 [R,L]
You can serve files from the web server by adding them to the web root using SFTP or other tools.
If you forget your password, you may run the following command to reset it:
/usr/local/lsws/admin/misc/admpass.sh
It will ask for the WebAdmin username, which should be admin. Then, enter your new password.
This method will automatically set up Listener/VirtualHost/Force SSL/Let’s Encrypt/WordPress.
Interactive mode
wget https://raw.githubusercontent.com/litespeedtech/ls-cloud-image/master/Setup/vhsetup.sh
chmod +x vhsetup.sh
bash vhsetup.sh
Or just run the script without downloading it:
/bin/bash <( curl -sk https://raw.githubusercontent.com/litespeedtech/ls-cloud-image/master/Setup/vhsetup.sh )
CLI mode
wget https://raw.githubusercontent.com/litespeedtech/ls-cloud-image/master/Setup/vhsetup.sh
chmod +x vhsetup.sh
bash vhsetup.sh -d www.example.com -le admin@example.com -f -w
Or just run the script without downloading it:
/bin/bash <( curl -sk https://raw.githubusercontent.com/litespeedtech/ls-cloud-image/master/Setup/vhsetup.sh ) -d www.example.com -le admin@example.com -f -w
-le YOUR_EMAIL-wBy default, OpenLiteSpeed has an example virtual host already created. You can create more virtual hosts if you like. See Create Virtual Hosts on OpenLiteSpeed.
OpenLiteSpeed was installed from the LiteSpeed repository, so you can simply use the system update to update OpenLiteSpeed to the latest stable version.
$ sudo apt-get update && sudo apt-get upgrade openlitespeed -y
The image comes with automatic certificate renewal by default in /etc/cron.d/certbot. An example of the cron job is:
0 */12 * * * root test -x /usr/bin/certbot -a \! -d /run/systemd/system && perl -e 'sleep int(rand(43200))' && certbot -q renew
Once you finish the Let’s Encrypt apply by prompt script, it will auto apply the server hook to the cronjob rule. An example of the cron job is:
0 */12 * * * root test -x /usr/bin/certbot -a \! -d /run/systemd/system && perl -e 'sleep int(rand(43200))' && certbot -q renew --deploy-hook "systemctl restart lsws"
This cron job is triggered twice every day to renew the certificate. The certbot -q renew command will check if the certificate is expiring in the next 30 days. If it is, then certbot will auto renew the certificate quietly without generating output, and auto restart the web server by hook. If the certificate is not expiring, then no action will be performed. When renewing the certificate, the same information provided during certificate creation (such as email address, domain name, web server root path etc.) will be used.
If your certificate renewal is successful, but for some reason the deploy hook is not being triggered, you can run the following command. This will insert a restart lsws command into the Certbot cronjobs.
echo '0 0 * * 3 root systemctl restart lsws' | sudo tee -a /etc/cron.d/certbot > /dev/null
This particular example triggers a web server restart every Wednesday at Midnight. You can modify the 0 0 * * 3 part of the command to adjust the schedule, if needed.
If you want to change the default startup file name from app.js to node.js, just update the Context and set Startup File = node.js.
OpenLiteSpeed comes with Node.JS in detached mode by default, so you will need to restart Node.JS with the following command to make any new settings take effect:
kill -9 $(pgrep -f 'lsnode')
Install Node.js by using n module
sudo n stable
     install : node-vX.X.X
       mkdir : /usr/local/n/versions/node/X.X.X
       fetch : https://nodejs.org/dist/vX.X.X/node-vX.X.X-linux-x64.tar.gz
################################################################################## 100.0%
   installed : vX.X.X
Setup binary link
ln -sf /usr/local/n/versions/node/X.X.X/bin/node /usr/bin/node
In this example, we are going to install the Ghost blog on default document root, /usr/local/lsws/Example/html/demo
Ghost CLI does not allow running as root, so we will need to create a user for Ghost CLI to run as and add them to the sudoers file.
adduser demouser
usermod -aG sudo demouser
Navigate to WebAdmin > Virtual Hosts > Example > Basic > Security, add demouser to both the suEXEC User and suEXEC Group fields.
Go to Virtual Hosts > Example > Context, edit the existing app server / context or click the Add button if it doesn’t exist, then update with the following settings:
URI: / Location: /var/www/html/blog Binary Path: /usr/bin/node Application Type: Node Startup File: current/index.js Run-time Mode: Production
sudo apt-get install mysql-server
sudo mysql
# Now update your user with this command
# Replace 'password' with your password, but keep the quote marks!
ALTER USER 'root'@'localhost' IDENTIFIED WITH mysql_native_password BY 'password';
quit
npm install -g ghost-cli@latest
Log in as the user:
su - demouser
Create the blog folder:
sudo mkdir -p /var/www/html/blog
Make sure demouser has permission to access the document root folder:
sudo chown -R demouser:demouser /var/www/html/blog/
sudo chmod 775 /var/www/html/blog/
Go to document root:
cd /var/www/html/blog
Ghost CLI will do most of the install for you. It will download the latest version and get it set up. So first let’s install Ghost by running the following:
ghost install local
Ghost was installed successfully! To complete setup of your publication, visit:

    http://localhost:2368/ghost/
Next, let’s set it up by running the following:
ghost setup --no-setup-nginx --no-setup-systemd --no-setup-ssl --no-start
Answer the installation questions:
? Enter your blog URL: http://example.com
? Enter your MySQL hostname: localhost
? Enter your MySQL username: root
? Enter your MySQL password: [hidden]
? Enter your Ghost database name: ghost_blog

Ghost was installed successfully! To complete setup of your publication, visit:

    http://example.com/ghost/
Be sure to use your login for MySQL username/password.
Restart web server:
systemctl restart lsws
Navigate over to your browser and visit your site http://example.com/. You should see the Ghost welcome screen:
You can accesshttp://example.com/ghost for the backend page.
That’s it!
Visit LSCache Without a Plugin doc
We can put following example rules to the OLS Web Admin > Virtual Hosts > Context > App Server context > Rewrite Rules:
CacheLookup on
RewriteCond %{ORG_REQ_URI} !/ghost/
RewriteRule .* - [E=cache-control:max-age=120]
And with that, you have just enabled caching on your site. All pages that are not in the ghost subdirectory, will be cached publicly for two minutes.
First, update the system packages, and then install some essential packages:
apt-get update && apt-get upgrade -y
apt install build-essential node-pre-gyp -y
Use npx to create a strapi app on the default document root:
cd /usr/local/lsws/Example/html/
npx create-strapi-app strapi --quickstart
You should see something like this:
 Project information

┌────────────────────┬──────────────────────────────────────────────────┐
│ Time               │ Tue Jan 26 2021 03:18:41 GMT+0000 (Coordinated … │
│ Launched in        │ 5677 ms                                          │
│ Environment        │ development                                      │
│ Process PID        │ 79279                                            │
│ Version            │ 3.4.4 (node v12.20.1)                            │
│ Edition            │ Community                                        │
└────────────────────┴──────────────────────────────────────────────────┘

 Actions available

One more thing...
Create your first administrator 💻 by going to the administration panel at:

┌─────────────────────────────┐
│ http://localhost:1337/admin │
└─────────────────────────────┘
You’ll be installing Strapi packages into the strapi app folder:
cd strapi
In order to avoid a known bug, edit package.json and specify the sqlite3 version instead of the latest:
"sqlite3": "5.0.0"
Install packages with npm:
npm install
Launch the server and run it with production settings:
NODE_ENV=production npm run build
npm run start
If it is a success, you should see something like this:
To manage your project 🚀, go to the administration panel at:
http://localhost:1337/admin

To access the server ⚡️, go to:
http://localhost:1337
In order to run on node instead of npm run start, you will need some JavaScript. Execute the following to add a start.js script to the Strapi app folder:
cat >> start.js <<END
const strapi = require('strapi');
strapi().start();
END
Navigate to the WebAdmin Console at port 7080 and go to Virtual Hosts > Example > Context and Add/Edit the / App Server context with the following entries:
//usr/local/lsws/Example/html/strapi//usr/bin/nodeNodestart.jsClick the Save button, and restart the web server.
To make sure the site is working, visit your site http://example.com/ from the browser. You should see the Strapi welcome screen:
and http://example.com/admin for admin access page
Setting up an Express app is easy. First, install the Express.js module:
npm install express --save
Then, change your startup file (app.js) from a Node.js program to an Express JS program:
const express = require('express')
const app = express()
const port = 3000

app.get('/', (req, res) => res.send('Hello World from OpenLitespeed Express JS!'))

app.listen(port, () => console.log(`Example app listening on port ${port}!`))
Finally, restart OpenLiteSpeed:
service lsws restart
And you’re done!
This script will:
/bin/bash <( curl -sk https://raw.githubusercontent.com/litespeedtech/ls-cloud-image/master/Setup/ols2ent-v2.sh )
We recommend you to run and test this script on a test server first. Get help by using the -H parameter for more information including how to revert back to OpenLiteSpeed if needed.
In addition to creating a Droplet from the Openlitespeed Node.js 1-Click application using the control panel, you can also use the DigitalOcean API.
The following example creates an Openlitespeed Node.js 20.04 Droplet called “My-Droplet” in the NYC3 datacenter, with 1 GB RAM:
curl -X POST "https://api.digitalocean.com/v2/droplets" \
    -d'{"name":"My-Droplet","region":"nyc3","size":"s-1vcpu-1gb","image":"litespeedtechnol-openlitespeedrai-20-04"}' \
    -H "Authorization: Bearer $TOKEN" \
    -H "Content-Type: application/json"
In addition to creating an instance from the Node.js using the AWS Management Console, you can also use the AWS Command Line Interface.
The following example creates an t2.micro Instance with Node.js AMI:
aws ec2 run-instances --image-id ami-04ded8321f23a57ad \
                        --subnet-id subnet-XXXXXXX \
                        --security-group-ids sg-XXXXXXXXXXXXXX \
                        --count 1 \
                        --instance-type t2.micro \
                        --key-name XXXXXX \
                        --query "Instances[0].InstanceId"
Please replace XXX to your own settings.
Get the exact name of the Node.js image from LiteSpeed’s project, gc-image-pub:
gcloud compute images list --project=gc-image-pub --filter="name ~ 'openlitespeed nodejs'"
Create an instance, replacing INSTANCE_NAME with the name of your choice, and IMAGE_NAME with the name obtained from the previous command:
gcloud compute instances create INSTANCE_NAME --image-project=gc-image-pub --image=IMAGE_NAME
The first time you launch, you may need to accept the marketplace terms using the following command:
Get-AzureRmMarketplaceTerms \
    -Publisher "litespeed_technologies" \
    -Product "openlitespeed-nodejs" \
    -Name "openlitespeed-nodejs" \
    | Set-AzureRmMarketplaceTerms -Accept
Find the release version you prefer:
az vm image list \
    --location westus \
    --publisher litespeed_technologies \
    --offer openlitespeed-nodejs \
    --all \
    --output table
Launch VM from that image:
az vm create \
    --resource-group your-group \
    --image litespeed_technologies:openlitespeed-nodejs:openlitespeed-nodejs:1.0.0 \
    --name myVM \
    --admin-username azure
Feel free to replace resource-group, image version, name, admin name, --generate-ssh-keys and more options with your own preferences.
Please check the Elastic Compute Service CLI Samples
Reference:
https://docs.litespeedtech.com/cloud/images/nodejs/
https://openlitespeed.org/kb/running-node-js-apps-with-openlitespeed/