July 9, 2021 . 2 MIN READ
http://www.webeditorsnotes.com/2012/04/six-steps-to-make-wamp-run-automatically-on-system-start-up-2/
Once WAMPServer is installed in your PC, you’ll be able to test your web projects before putting it into the live environment. But I always found it a hassle to manually start the service every time I need it. With these easy steps, you’ll never have to manually start WAMPServer ever again.
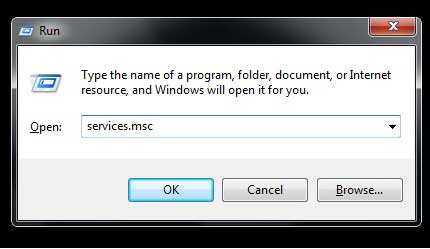
Windows Key + R
 2. Type services.msc and click OK. This will open the Services Management Console.
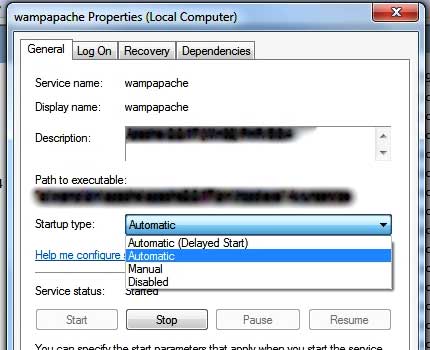
3. In Services Management Console, look for ‘wampapache‘. The Startup Type will be set to ‘Manual’ and so we’ll need to change this to ‘Automatic‘. Right-click on it and select ‘Properties’.

In the properties window, select ‘Automatic‘ for ‘Startup Type‘. Then, click on ‘Apply‘ and then close the property window. We’ve just set the Apache side of WAMP to run automatically on startup.
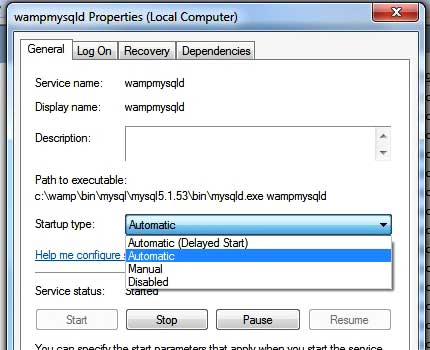
4. Still in Services Management Console, look for ‘wampmysqld‘. We’ll also set this to automatic, so right-click on it and select ‘Properties‘.

Select ‘Automatic‘ for ‘Startup Type’. Click on ‘Apply’ and then close the Properties and Services Management Console.
5. Restart your machine/PC.
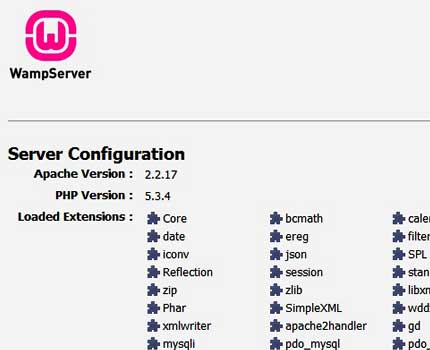
6. After the restart, log back in and open a browser. Type 127.0.0.1 in the address bar. 127.0.0.1 is the address for the local installation of WAMPServer in your PC. If the Server Configuration page for WAMPServer loads – Congratulations, you’ve just successfully automated your WAMPServer startup.
If you found these steps useful. Please help share the knowledge. That’s what the web was built for.