- In the Google Cloud Console, go to the VM instances
Go to VM instances
- Next to the instance that has the new attached disk, click the SSH The browser opens a terminal connection to the instance.
- Use the dfcommand and the lsblk command to list the size of the file system and find the device names for your disks.
4. $ sudo df -Th5. 6. Filesystem Type Size Used Avail Use% Mounted on7. /dev/sda1 ext4 9.7G 1.2G 8.5G 12% /8. /dev/sdb ext4 250G 60M 250G 1% /mnt/disks/disk-19. 10. $ sudo lsblk11. 12. NAME MAJ:MIN RM SIZE RO TYPE MOUNTPOINT13. sda 8:0 0 20G 0 disk14. └─sda1 8:1 0 10G 0 part /15. sdb 8:16 0 500G 0 disk /mnt/disks/disk-116.
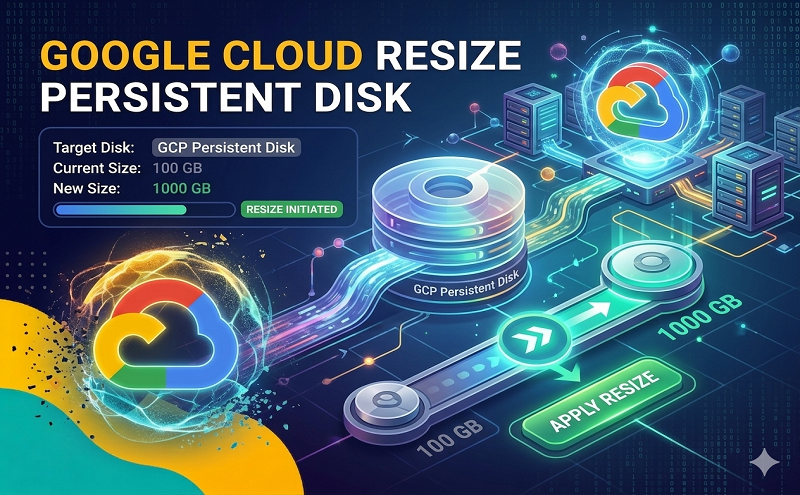
This example includes the following disks:
- Boot disk: The /dev/sda1partition is on a boot disk that has been resized to 20 GB. The partition table and the file system provide only 9.7 GB to the operating system.
- Non-boot data disk: The /dev/sdbnon-boot data disk has no partition table, but the file system on that disk provides only 250 GB to the operating system. The mount directory for this disk is /mnt/disks/disk-1.
The df command shows that the /dev/sda1 partition is mounted as the root file system, and the /dev/sdb disk is mounted as a non-boot data disk at /mnt/disks/disk-1. Make note of the Type column, which indicates if your disk uses an ext4 or xfs file system.
- Resize the root partition and file system on the boot disk. This example assumes the VM image does not support automatic root partition and file system resize.
- Resize the root partition by using parted. For example, the following partedcommand in interactive mode expands partition 1 of /dev/sda to the maximum possible size:
b. sudo parted /dev/sdac. …d. (parted) resizeparte. Partition number? 1f. Warning: Partition /dev/sda1 is being used. Are you sure you want to continue?g. Yes/No? yh. End? [10.7GB]? 100%i. (parted) quit
- Move GPT data structures to the end of the disk to align the GPT table.
k. sudo sgdisk –move-second-header /dev/sda
- Read the new partition table using partprobe.
m. sudo partprobe /dev/sda
- If you are using ext4, use the resize2fscommand to extend the file system:
o. sudo resize2fs /dev/sda1
- If you are using xfs, use the xfs_growfscommand to extend the file system:
q. sudo xfs_growfs -d /
- Resize the file system on the non-boot data disk.
- . If you are using ext4, use the resize2fscommand to extend the file system:
a. sudo resize2fs /dev/DEVICE_NAME
Replace DEVICE_NAME with the device name for the disk. In this example, the device name is /dev/sdb.
- If you are using xfs, use the xfs_growfscommand to extend the file system:
c. sudo xfs_growfs MOUNT_DIR
Replace MOUNT_DIR with the mount point of the device. You can find the mount point listed in the MOUNTPOINT column in the output of the lsblk command.
- Use the dfcommand to verify that the file system is extended. For example:
df -h /dev/sdb
Reference: https://cloud.google.com/compute/docs/disks/resize-persistent-disk