July 7, 2021 . 7 MIN READ
/var/www/html, you should see the Apache test page. When you add content to the document root, your content appears at the public DNS address of your instance instead of this test page.Verify that the security group for the instance contains a rule to allow HTTP traffic on port 80. For more information, see Add rules to a security group.
If you are not using Amazon Linux, you may also need to configure the firewall on your instance to allow these connections. For more information about how to configure the firewall, see the documentation for your specific distribution.
Apache httpd serves files that are kept in a directory called the Apache document root. The Amazon Linux Apache document root is /var/www/html, which by default is owned by root.
[ec2-user ~]$ ls -l /var/www
total 16
drwxr-xr-x 2 root root 4096 Jul 12 01:00 cgi-bin
drwxr-xr-x 3 root root 4096 Aug  7 00:02 error
drwxr-xr-x 2 root root 4096 Jan  6  2012 html
drwxr-xr-x 3 root root 4096 Aug  7 00:02 icons
drwxr-xr-x 2 root root 4096 Aug  7 21:17 noindex
To allow the ec2-user account to manipulate files in this directory, you must modify the ownership and permissions of the directory. There are many ways to accomplish this task. In this tutorial, you add ec2-user to the apache group, to give the apache group ownership of the /var/www directory and assign write permissions to the group.
To set file permissions
ec2-user) to the apache group.
[ec2-user ~]$ sudo usermod -a -G apache ec2-user[ec2-user ~]$ exitapache group, reconnect to your instance, and then run the following command:
[ec2-user ~]$ groups
ec2-user wheel apache/var/www and its contents to the apache group.
[ec2-user ~]$ sudo chown -R ec2-user:apache /var/www/var/www and its subdirectories.
[ec2-user ~]$ sudo chmod 2775 /var/www [ec2-user ~]$ find /var/www -type d -exec sudo chmod 2775 {} \;/var/www and its subdirectories:
[ec2-user ~]$ find /var/www -type f -exec sudo chmod 0664 {} \;Now, ec2-user (and any future members of the apache group) can add, delete, and edit files in the Apache document root, enabling you to add content, such as a static website or a PHP application.
(Optional) Secure your web server
A web server running the HTTP protocol provides no transport security for the data that it sends or receives. When you connect to an HTTP server using a web browser, the URLs that you visit, the content of webpages that you receive, and the contents (including passwords) of any HTML forms that you submit are all visible to eavesdroppers anywhere along the network pathway. The best practice for securing your web server is to install support for HTTPS (HTTP Secure), which protects your data with SSL/TLS encryption.
For information about enabling HTTPS on your server, see Tutorial: Configure SSL/TLS with the Amazon Linux AMI.
If your server is installed and running, and your file permissions are set correctly, your ec2-user account should be able to create a PHP file in the /var/www/html directory that is available from the internet.
To test your LAMP web server
[ec2-user ~]$ echo "<?php phpinfo(); ?>" > /var/www/html/phpinfo.phpIf you get a “Permission denied” error when trying to run this command, try logging out and logging back in again to pick up the proper group permissions that you configured in Step 1: Prepare the LAMP server.
http://my.public.dns.amazonaws.com/phpinfo.phpYou should see the PHP information page:
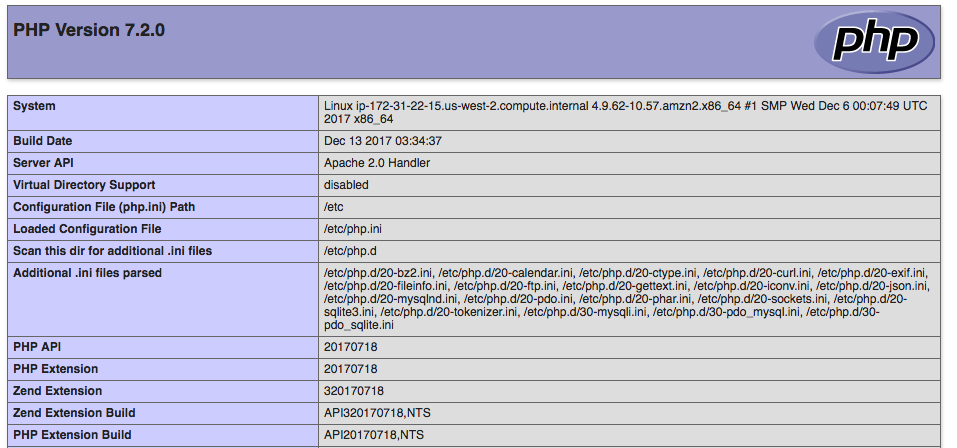
If you do not see this page, verify that the /var/www/html/phpinfo.php file was created properly in the previous step. You can also verify that all of the required packages were installed with the following command. The package versions in the second column do not need to match this example output.
[ec2-user ~]$ sudo yum list installed httpd24 php72 mysql57-server php72-mysqlnd
Loaded plugins: priorities, update-motd, upgrade-helper
Installed Packages
httpd24.x86_64                          2.4.25-1.68.amzn1                    @amzn-updates
mysql56-server.x86_64                   5.6.35-1.23.amzn1                    @amzn-updates
php70.x86_64                            7.0.14-1.20.amzn1                    @amzn-updates
php70-mysqlnd.x86_64                    7.0.14-1.20.amzn1                    @amzn-updates
If any of the required packages are not listed in your output, install them using the sudo yum install package command.
phpinfo.php file. Although this can be useful information, it should not be broadcast to the internet for security reasons.
[ec2-user ~]$ rm /var/www/html/phpinfo.phpThe default installation of the MySQL server has several features that are great for testing and development, but they should be disabled or removed for production servers. The mysql_secure_installation command walks you through the process of setting a root password and removing the insecure features from your installation. Even if you are not planning on using the MySQL server, we recommend performing this procedure.
To secure the database server
[ec2-user ~]$ sudo service mysqld start
Initializing MySQL database:
...

PLEASE REMEMBER TO SET A PASSWORD FOR THE MySQL root USER !
...

Starting mysqld: [ OK ][ec2-user ~]$ sudo mysql_secure_installationY to set a password, and type a secure password twice. For more information about creating a secure password, see https://identitysafe.norton.com/password-generator/. Make sure to store this password in a safe place.Setting a root password for MySQL is only the most basic measure for securing your database. When you build or install a database-driven application, you typically create a database service user for that application and avoid using the root account for anything but database administration.Y to remove the anonymous user accounts.Y to disable the remote root login.Y to remove the test database.Y to reload the privilege tables and save your changes.[ec2-user ~]$ sudo service mysqld stop
Stopping mysqld: [ OK ][ec2-user ~]$ sudo chkconfig mysqld onYou should now have a fully functional LAMP web server. If you add content to the Apache document root at /var/www/html, you should be able to view that content at the public DNS address for your instance.
To install phpMyAdmin
phpMyAdmin is a web-based database management tool that you can use to view and edit the MySQL databases on your EC2 instance. Follow the steps below to install and configure phpMyAdmin on your Amazon Linux instance.
We do not recommend using phpMyAdmin to access a LAMP server unless you have enabled SSL/TLS in Apache; otherwise, your database administrator password and other data are transmitted insecurely across the internet. For security recommendations from the developers, see Securing your phpMyAdmin installation.
The Amazon Linux package management system does not currently support the automatic installation of phpMyAdmin in a PHP 7 environment. This tutorial describes how to install phpMyAdmin manually.
[ec2-user ~]$ sudo yum install php72-mbstring.x86_64 -y[ec2-user ~]$ sudo service httpd restart
Stopping httpd: [ OK ]
Starting httpd: [ OK ]/var/www/html.
[ec2-user ~]$ cd /var/www/html [ec2-user html]$ [ec2-user html]$ wget https://www.phpmyadmin.net/downloads/phpMyAdmin-latest-all-languages.tar.gz[ec2-user html]$ mkdir phpMyAdmin && tar -xvzf phpMyAdmin-latest-all-languages.tar.gz -C phpMyAdmin --strip-components 1phpMyAdmin-latest-all-languages.tar.gz tarball.
[ec2-user html]$ rm phpMyAdmin-latest-all-languages.tar.gz[ec2-user ~]$ sudo service mysqld start
Starting mysqld: [ OK ]http://my.public.dns.amazonaws.com/phpMyAdminYou should see the phpMyAdmin login page:
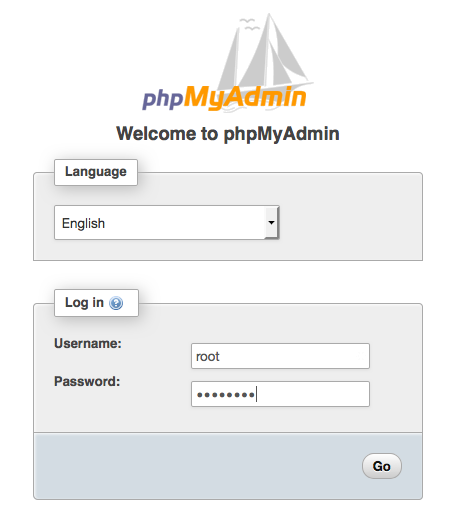
root user name and the MySQL root password you created earlier.Your installation must still be configured before you put it into service. To configure phpMyAdmin, you can manually create a configuration file, use the setup console, or combine both approaches.
For information about using phpMyAdmin, see the phpMyAdmin User Guide
http://docs.aws.amazon.com/AWSEC2/latest/UserGuide/install-LAMP.html